DIY Kitchen Island - Add Seating and Storage On A Budget
A kitchen island with seating is the ultimate way to add function and style to your kitchen, even on a budget. With some simple DIY skills, you can build your own island and customize it with space-saving seating and storage solutions.
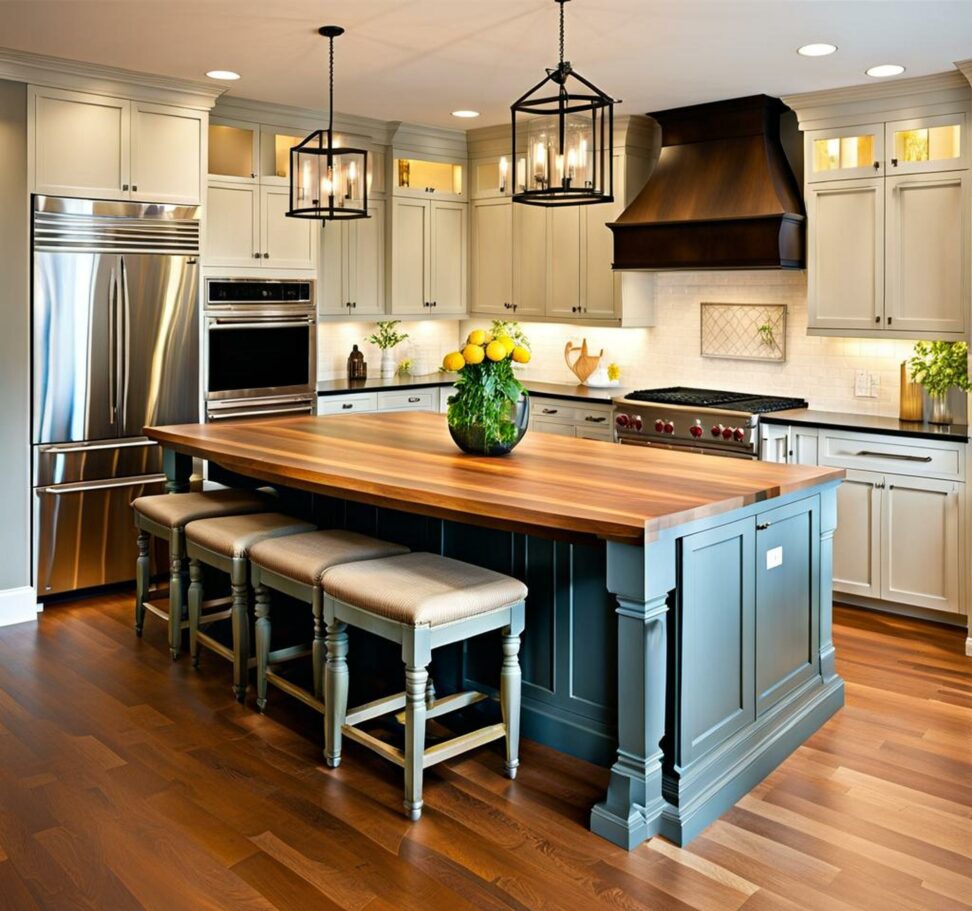
An island with seating instantly creates a casual dining space for quick breakfasts or chatting over coffee. Tucking stools underneath when not in use keeps your floor clear. You'll gain extra counterspace for meal prep and entertaining while maximizing every inch.
Choose the Right Island Size and Layout
First, measure your kitchen floor space. Leave enough room around the island perimeter for traffic flow - 36 inches minimum. Decide on island dimensions based on your room size.
A 4 foot x 3 foot island can accommodate two counter-height stools. For more seating, go bigger. Just ensure adequate clearances. An L-shaped island is great for ample seating and storage.
Pick Your Preferred Seating Style
Counter-height stools that tuck under the island overhang are classic. Allow at least 12 inches overhang depth. Barstools with backs offer lumbar support. Built-in bench seating makes use of every inch. Upholstered benches add comfort and style.
Remember to factor in enough leg room when incorporating seating. Pull stools 24-30 inches from island edge for proper ergonomics.
Storage Solutions Under Seats
Maximize unused space under seating areas with pull-out drawers for storing kitchen essentials. Open bookshelves or rattan baskets keep items visible but contained. For standard height islands, cabinets and shelves can be incorporated.
Overhang Storage for Stools
Extending your countertop overhang to at least 12 inches allows stools to tuck completely underneath and out of the way. Minimal-profile backless stools, ranging from 24 to 30 inches high, work best for this.
Build a Sturdy Base
Construct a strong base frame using 2x4s or 2x6s secured with wood screws. You can attach locking casters for mobility. Use plywood for cabinet bases or open shelving.
Cut braces and secure into the base frame corners for reinforcement. An additional center brace further prevents racking and wobbling.
Choose Your Countertop
Butcher block, laminate, and tile are budget-friendly countertop solutions. Stain-grade plywood with a polyurethane finish is also an option. Consider durability and maintenance requirements.
Cut your countertop slightly oversized. Use wood glue and brackets to attach to base. A belt sander helps smooth and finish countertop edges.
Personalize your DIY kitchen island with seating and make it a focal point. Add a tile backsplash and pendant lighting for style. Match the island stain or paint to your existing cabinetry for a cohesive look. Stow cooking utensils in drawers and hooks.
Even on a limited budget, you can create a kitchen island with seating and storage. Just follow crucial design rules for proportions and you'll soon enjoy the form and function of your handy new build.